Reading Challenge 2016 Conclusion

So 2016 on the blog didn’t go as well as I’d hoped.   Attending a blogging conference completely killed my drive instead of inspiring me to achieve more, but I want to celebrate successes, and perhaps go on to achieve other things in 2017.

I last visited the Goodreads 2016 reading challenge in March when I’d read 4 books in 2 months.   Things slowed from then, and I reevaluated what I actually WANTED to read rather than what I felt I should.   One of the books took a long time as I didn’t really enjoy it (The House at the Edge of the World), but I managed to get 12 books read and I’m really happy.

  1. An unfinished book – Helen Fielding – Mad About the Boy
  2. A new author to me – Kate Thompson – Secrets of the Singer Girls
  3. A celebrity autobiography – Mary Portas – Shop Girl
  4. A book written by/about a historical figure – Lord Baden-Powell – The Wolf that Never Sleeps
  5. A children’s book – Jacqueline Wilson – Best Friends
  6. A book club read – Julia Rochester – The House at the Edge of the World
  7. Sophie Kinsella – The Undomesticated Goddess
  8. Amanda Egan – Kissing Frogs and Dogs
  9. Amanda Egan – Catnaps and Flapjacks
  10. Jenny Colgan – Christmas at the Little Beach Street Bakery
  11. Margaret Forster – My Life in Houses
  12. A book adapted into a film – Helen Fielding – Bridget Jones’s Baby: The DiariesThe categories of books I didn’t read were a classic read, a book recommended by a librarian, an award winning book, a book I should have read at school, and a Goodreads recommendation.   I guess Chick Lit is my thing.   A bit of easy reading escapism from all the demands on my day.

    My favourite reads were My Life in Houses (my brother went to primary school with one of Margaret Forster’s children and I remember going to their house to pick him up after a birthday party), Bridget Jones’s Baby (I still haven’t seen the film), and Christmas at the Little Beach Street Bakery.   I also enjoyed The Wolf that Never Sleeps, although it wasn’t very well written.   The Guiding/Scouting history was very interesting, although I preferred Olave Baden-Powell’s autobiography, Window on my Heart.

    I will be doing the challenge again in 2017 as reading is something that gets me away from the TV and laptop.   Perhaps I’ll hoover up some of the categories I didn’t get around to in 2016, or perhaps I’ll just choose books I’ll enjoy.   Whatever happens, I’ll be reading and that’s the important thing.

Fiskars Simple 3-in-1 Tag Maker

Fiskars 3-in-1 Tag Maker ReviewI have been looking for a tag maker for some time but haven’t been able to find one I trusted with the dimensions I wanted.   Watching the new series of Crafty Beggars in the House! on the Community Channel, I saw them use some Fiskars tag punches to upcycle some cards – exactly what I needed!Fiskars simple 3-in-1 Tag Maker With EyeletsI bought mine from Amazon and chose the Simple design as I like the shape.   The tag punch is substantial and sturdy – what I expect from Fiskars – and comes with 20 metal eyelets.   I have a large stash of last year’s Christmas cards and set to work on them to make some tags for this Christmas.Fiskars Simple 3-in-1 Tag Maker Card PreparationHaving selected the area of the design to use, I trimmed the card so that I could get the punch in the right place.Fiskars Simple 3-in-1 Tag Maker Punching TagWith punches, I always find that turning the whole thing upside down and viewing the design through the aperture gets it cut out accurately.   The punch cut through really easily, even on cards with glitter or cards with textured finishes.Fiskars 3-in-1 Tag Maker Punching HoleOnce the card is cut, there is another slot to put the tag into to get the hole cut accurately.Fiskars 3-in-1 Tag Maker Punched TagRight on the pompom!   The tags can be left like this with ribbon or string threaded through the hole (as a good Guide leader, I use a cow hitch or lark’s head knot).   The pack also comes with metal eyelets which can be used to reinforce the hole and make a really professional finish.Fiskars 3-in-1 Tag Maker Applying EyeletSimply feed the hole in the tag over the post under the handle, add an eyelet and squeeze.   It doesn’t feel like you are doing much and that you need to press harder, but the eyelet attaches really easily.Fiskars 3-in-1 Tag Maker Finished TagI am never throwing away a card again.   I had some cards that I’ve used to make birthday tags, as well as the Christmas tags.   I also have my eye on youngest Craftyguidelet’s birthday cards at the moment, and they will be going through the punch as soon as they come off the mantelpiece.Fiskars 3-in-1 Tag Maker TagsI think this lot will get me though next Christmas, and all for just the price of the punch and a bit of twine.    I also have plenty of card in my stash to get me through every possible occasion outside of Christmas so if you need me, I’ll be punching tags out of whatever will fit in the machine!

Disclaimer: I own this punch and I haven’t been asked to review it, or been paid to review it.   All opinions are my own, and I have added some links to the normal Amazon site where I bought mine.   They are not affiliate links and I don’t get any money if you click on them.

Reading Challenge – February Update

2016The end of month two of my reading challenge and I’ve finished 4 books out of the 12!
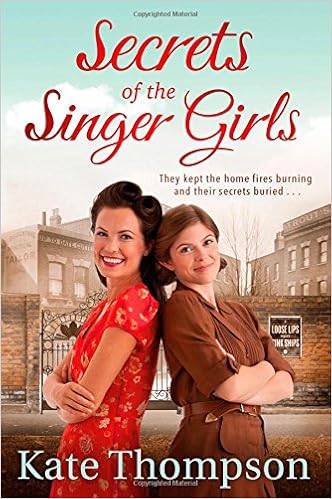
In February, I finished Secrets of the Singer Girls by Kate Thompson.   I really enjoyed this book, despite it not being something I would normally pick up.   Having enjoyed Home Fires on ITV recently about a rural WI during the outbreak and early months of WWII, I think I saw this book as a recommended read so put it on my Kindle.   It’s the story of a young girl, sent into London from the countryside, and the women she meets at a garment factory in Bethnal Green.   Each woman had a story to tell, and some of the stories of what they had to endure during the war years were quite harrowing.   The Bethnal Green tube station disaster was also included in the story.   There were uplifting parts too, including the way the women looked out for each other in their community.
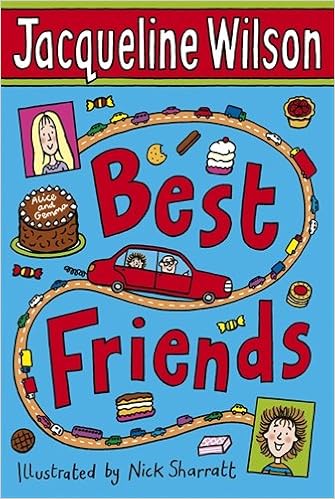
The other book I read was Best Friends by Jacqueline Wilson.   This was a recommendation from my 9 year old daughter as it’s her favourite book of the many hundreds of books she gets through.   I’ve never read any Jacqueline Wilson books before so it was quite interesting to see what her books were like.   I did enjoy the story, but I think I read it as a mother rather than the BFF girls in the story.   I’m getting far too sensible in my old age!

My current read is A God in Ruins by Kate Atkinson.   Although it’s in my Award Winning Book category, it was recommended by my librarian twitter friend @HamertonSally.

  1. An unfinished book – Helen Fielding – Mad About the Boy – finished
  2. A new author to me – Kate Thompson – Secrets of the Singer Girls –finished
  3. A classic read – possibly a Brontë or a Jane Austen
  4. A book recommended by a librarian – Mary Shelley – Frankenstein
  5. A book that’s been adapted into a film – possibly Room by Emma Donoghue.   I still haven’t seen the film so I can read the book before it hits the DVD rental market.
  6. A celebrity autobiography – Mary Portas – Shop Girl – finished
  7. A book written by/about a historical figure – Lord Baden-Powell – The Wolf that Never Sleeps
  8. An award winning book – Kate Atkinson – A God in Ruins – currently reading
  9. A children’s book – Jacqueline Wilson – Best Friends – finished
  10. A celebrity book club read.
  11. A book I should have read at school rather than just the York Notes – probably Le Grand Meaulnes by Alain-Fournier, although in English this time rather than French.   It’s been too long since I got my languages degree!
  12. A Goodreads recommendation.

Here’s to 2016

Goodbye 2015 (1)At the beginning of 2015, I resolved not to have any resolutions, not to sign up to any social media obligations like photo-a-day or blog-a-week, not to join in with quilt a month, crochet along etc. and not to heap too much pressure on myself to join in and fit in with the crowd.

To some extent I’ve succeeded in this (especially the not blogging regularly part – oops!) but I’m not quite there.

My aim for 2016 is to get organised.   I want to declutter and put systems in place to get my life, head and home in order.   I want to complete ‘to do lists’ rather than keep putting things off.   I want a crafting area that is inspirational, rather than a pile of work in progress.   I want to minimise food waste by planning meals better and shopping smarter.   I want to put my health higher up in my priorities.

But for now, I’d like to wish everyone a happy new year and I hope 2016 is everything you want it to be.

Review – How to Bake by Paul Hollywood

Paul Hollywood How to BakeI’ve had Paul Hollywood’s How to Bake book since it came out in 2012 and I have used it for simple bread recipes.   The problem is that it is a gluten fest and anything I bake from it can’t be eaten by gluten intolerant Mr CG.   This means extras for the Craftyguidelets and myself, but that means an expanding waistline for me!Paul Hollywood How to Bake doughTo try something different, I used Paul’s recipe for Hot Cross Buns rather than my normal cut-from-a-magazine-and-stashed-in-my-recipe-file one which I’ve used before.   I say “used the recipe”, but I follow my Master Baker Dad’s advice and bung in much more dried fruit and spices than normal recipes state.Paul Hollywood How to Bake recipeThe recipe was easy to follow, and some of the techniques such as piping the crosses on brought back memories of when my brothers and sister and I “helped” in the bakehouse when we were young.Paul Hollywood How to Bake crossesIt took several hours to keep proving the dough at each stage before I could bake them, but having been brought up in a family bakery with my Dad’s fruity, spicy hot cross buns, I can’t buy the sorry excuses that supermarkets sell these days.Paul Hollywood How to Bake hot cross bunsThey turned out really well and were probably a bit knobbly because I’d crammed in so much fruit, but they were delicious.Paul Hollywood How to Bake buttered hot cross bunsWarm from the oven and spread with butter.   Definitely not Slimming World friendly, but Easter only happens once a year.   Unless you count Orthodox Easter of course!

Disclaimer: I own this book and I haven’t been asked to review it, or been paid to review it.   All opinions are my own, and I have added some links to the normal Amazon site where I bought my copy.   They are not affiliate links and I don’t get any money if you click on them.

Tutorial: How to mount an unmounted rubber stamp

how to mount a stamp as boughtThere are lots of different type of stamp available on the market.   When I started crafting *eh-herm* a few years ago, wood mounted blocks were the thing.   They are the ones with typically a red or grey rubber stamp stuck on a wooden handle.   They are easy to use but difficult to position on the page accurately as you cannot see the image when you stamp.   They are also bulky to store.

Clear stamps are great.   They cling to acrylic blocks so that you can use them, you can see where they are going to stamp and they are easy to store.

Sometimes though, you get lovely images on unmounted rubber stamps like the one above from one of my favourite stamp suppliers, Lili of the Valley.   They do have the storage benefits of clear stamps, but they need mounting before they can be used.

how to mount a stamp stick to mounting foamYou need to buy some mounting foam which has a permanent adhesive on one side, and a cling surface on the other.   I had an offcut (the light grey in the picture) which fitted my stamp, and I fixed the stamp to the permanent adhesive side.how to mount a stamp trim excessTo ensure a clean stamped image, carefully trim the excess foam and rubber leaving a small border around the edge.  Non stick scissors are good for this.   It helps avoid those annoying smudges at the edges of stamped images where the ink pad has caught the background as well as the raised image.how to mount a stamp trimmed stampThis is my trimmed stamp.   The foam backing gives an even image transfer as you can really squish it down when you stamp.how to mount a stamp finished stampI use Memento ink pads when I stamp an image I want to colour in with my Promarkers so the ink doesn’t bleed.

Isn’t it a gorgeous image?   It was chosen by youngest Craftyguidelet when she came to a craft show with me.   She’s got good taste!

Disclaimer: Any links contained in this blog are not affiliate links and I don’t get any money if you click on them.

Review – Cath Kidston Sewing Book

Cath Kidston Sewing BookFather Christmas was very generous this year and got me the latest Cath Kidston Sewing Book.   I have other Cath Kidston books in the bookcase already, and this one is a similar format.   The book comes with a kit using Cath Kidston fabric, and a variety of projects with patterns to photocopy at the back.Cath Kidston Sewing Book ContentsThere are more than 30 simple patterns in the book for a wide range of projects, together with basic techniques explained at the beginning.  I started with the kit supplied with the book which was for a pocket sewing kit.Cath Kidston Sewing Book kitThe fabric was pre-cut so I didn’t need the pattern which I photocopied from the back.   However the fabric was cut incorrectly.   As the very lovely bird fabric is directional, the outside panel needed to be cut a certain way so that the bottom pocket was the right way up.   This is clearly explained in the instructions, however the manufacturer obviously didn’t read them!   It meant that there was a curved edge where there should’ve been a straight edge, and so there was a gap at the edges.Cath Kidston Sewing Book Finished KitI did find some of the instructions a bit vague, but the finished product is nice.   It has one zipped pocket, one open pocket and one buttoned pocket.   The instructions tell you how to make buttonhole loops but I put in machined buttonholes for speed.   The book seems aimed at beginners, but I found I needed some experience to make sense of some of the stages.

What crafty presents did Father Christmas bring you?

Disclaimer: I own this book and I haven’t been asked to review it, or been paid to review it.   All opinions are my own, and I have added some links to the normal Amazon site where I bought my copy.   They are not affiliate links and I don’t get any money if you click on them.

Review – Sweets Made Simple by Miss Hope and Mr Greenwood

Last year I was blown away by the BBC2 series ‘Sweets Made Simple’ with Miss Hope and Mr Greenwood.   I loved the variety of sweets and the way the programme was presented.   I downloaded the book to my tablet but found that it was neglected.   Just before Christmas I treated myself to the hardback copy and was able to appreciate the recipes much better.sweets made simple contentsThe first part of the book has some really helpful notes about the alchemy of sweet making: important things to remember when working with hot sugar, what the difference between soft ball and hard crack is, the ins and outs of using chocolate, and how to store your creations when you are done.   Who am I kidding?   Storing the sweets?   They’ll all be gone before they need to be stored!sweets made simple raspberry coulisThe first recipe I tried was Raspberry Marshmallows.   Even from the first stage of making the raspberry coulis (or lovely ruby-red mush as described in the book) I was hooked.sweets made simple raspberry marshmallow settingYou need to devote a good hour or so making it, followed by a couple of hours sitting on your hands, resisting the urge to dig a spoon in and eat your body weight in creamy, sugary loveliness.sweets made simple raspberry marshmallowsThis marshmallow is GORGEOUS!   The raspberry coulis is marbled through the soft creamy marshmallow, and the fresh raspberries are juicy little accents.   I think this should be one of your five a day.sweets made simple raspberry marshmallowThere are so many recipes I’ll be trying in this book.   Next on the list is Penuche which is a type of fudge, and I’ve got enough ingredients in the cupboard to try making Cinder Toffee.   Looks like the Slimming World target is slipping further away…

Disclaimer: I own this book and I haven’t been asked to review it, or been paid to review it.   All opinions are my own, and I have added some links to the normal Amazon site where I bought my copy.   They are not affiliate links and I don’t get any money if you click on them.

Review – Gluten Free Baking by Michael McCamley

In my quest to use more of my book collection, I had to start somewhere, and cake is a very good place to start.

Mr Craftyguider has a gluten intolerance, so to make sure he can share some of the responsibility of consuming cake calories, I mostly bake with gluten free ingredients.   Because of the nature of gluten free ingredients, I usually follow recipes that are specifically gluten free rather than just substituting gluten free flour for wheat flour in standard recipes.

Gluten free baking book contents pageMichael McCamley’s Gluten Free Baking book was recommended by someone on twitter and there is a wide variety of bakes inside.   I am after the elusive recipe for decent gluten free bread and pastry I can bake at home.Gluten free baking book info pagesThe book starts with an introduction on what gluten is, the different problems people can experience with an allergy or intolerance to gluten, where to look for gluten in foods, and what alternatives are available.Gluten free baking book small cakesI chose the recipe for banana muffins with maple cream frosting from the first chapter as I had all the ingredients to hand, as well as some very spotty bananas to use up.   The recipe method isn’t as detailed as some I’ve used in the past, and the mix looked wrong at some stages of the process.   However, I trusted the recipe and got to a mix consistency I recognised as cake batter at the end.Gluten free baking  book Banana muffin with maple cream frostingThe resulting cake tasted as good as it looks, and I couldn’t tell that it was a gluten free cake.   It was lovely and moist, had loads of banana, and the maple syrup cream cheese frosting was divine.   We ate them over 3 days and they kept perfectly well in a tin in the fridge.Gluten free baking book large cakesThere is a wide variety of cakes and biscuits in this book and I will definitely be trying more out based on my first success.   The book gives recipes for flours to blend at home to make the various mixes (e.g. bread flour, self raising etc.), but I prefer using the Doves Farm branded pre-blended flours available from most supermarkets where I can.   I once counted 19 different types of gluten free flours and standard wheat flours in my baking cupboard when I used to do home blends.   That was too much to store and keep track of, so I’m currently at about 8.Gluten free baking book breads and pastriesBreads and Savoury Pastries are the gluten free recipes I’ve never mastered.   I think that the structure the gluten gives them is more important than in a cake.   Perhaps this is the book that will solve these problems.Gluten free baking Phil VickeryThese Phil Vickery books were the first gluten free books I tried that I had success with (and also the reason I had lots of flours to blend in my cupboard!).Gluten free baking Cake AngelsMy go to book for easy baking is the Cake Angels book by Julia Thomas.   It uses basic ingredients that are easy to get hold of, the instructions are simple to understand, and there is a wide range of cake recipes.   Again, the recipes don’t taste like they are gluten free.   She does also make the recipes dairy free, but I sometimes substitute the dairy free ingredients for ones that contain dairy as we don’t have a problem with lactose.

Do you have a favourite gluten free baking book which always gives you good results?

Disclaimer: I own all of these books and I haven’t been asked to review them, or been paid to review them.   All opinions are my own, and I have added some links to the normal Amazon site where I bought my copies.   They are not affiliate links and I don’t get any money if you click on them.

Museum of London – Review

With the Craftyguidelets learning about the Great Fire of London in KS1 and Stone Age to Bronze Age in KS2 next term, we planned a day trip to the Museum of London near St Paul’s Cathedral to do a bit of ‘research’.

London Wall

The museum is right in the heart of the history it is curating.   Parts of the London Wall are ‘displayed’ through windows on the upper level.   I’ve no idea why the man in the picture appears to be taking a selfie lying down in the shade of the wall!

We were met at the door by a member of staff who asked us about our visit.   She showed us to the various activity sheets for children which you can also download before you leave home.   We picked up the War, Plague and Fire one for youngest Craftguidelet.   As there was nothing for eldest to have, the staff member got her some leaflets with pictures from the gallery, and also lent her a clipboard and A4 paper to draw pictures and take notes on.   She also met up with us later in the day and showed a genuine interest in what the Craftyguidelets had done.   It’s great when someone goes above and beyond the call of duty.

Photography is permitted in the museum but flashes aren’t so forgive the dodgy pics!
IMG_4039The galleries inside take you on a chronological journey through the history of London, starting in the ‘London before London’ gallery.   This took us from the Stone Age through to Bronze Age with displays of artefacts discovered in the London area.
IMG_4047This Bronze age helmet is supposed to demonstrate the ferocity and virility of the owner.   Not your normal head gear for a night on the pull any more!
IMG_4055The Roman area had this mock up of a Roman house.   I love the mosaic floor.

Moving on through Medieval London and past a 100 year old model of the old St Paul’s cathedral, we arrived in the War, Plague and Fire gallery.   There was a quite disturbing film presentation of the spread of the Black Death which we moved on from, and then on to the Great Fire of London.
IMG_4062It was great to show 5 year old Craftyguidelet examples of houses and how people lived in 1666 when the fire happened, as a background to what she will be learning about in the classroom.   The museum is also in the area where the fire took hold, which also gave her another perspective.
IMG_4064These fabulous dresses were in a recreation of the Pleasure Gardens.   I was a bit confused by the film dramatisation that was projected as part of the experience though.

After travelling through the Victorian shop recreations, we carried on moving through history to modern London.
IMG_4069This is a bronze lift from Selfridges from 1928.   I love the grandness of it.
IMG_4071The Suffragettes were also featured with a large display, including this embroidery from Holloway Prison.
IMG_4075This was from a display of equipment from a bakery demolished in 1966 to make way for a new development.   Being a Master Baker and Confectioner’s daughter, I am drawn to bakery memorabilia.
IMG_4083IMG_4086Probably the most thrilling part for me was the story of the development of the Olympic cauldron from the 2012 London games.   The actual petal for Great Britain was displayed.   I didn’t realise there were 3 cauldrons made – one for the Olympics, one for the Paralympics and one for testing.   The scale and the detail were staggering.

We really enjoyed our day out at the museum.   It held everyone’s interest throughout our visit, and there are probably details we missed to go back and see another time.   Entrance is free but we did leave a donation in the box.

This review is based on my own opinion of our family day out.   I received no incentives to go or to write a review.