Tutorial: How to mount an unmounted rubber stamp

how to mount a stamp as boughtThere are lots of different type of stamp available on the market.   When I started crafting *eh-herm* a few years ago, wood mounted blocks were the thing.   They are the ones with typically a red or grey rubber stamp stuck on a wooden handle.   They are easy to use but difficult to position on the page accurately as you cannot see the image when you stamp.   They are also bulky to store.

Clear stamps are great.   They cling to acrylic blocks so that you can use them, you can see where they are going to stamp and they are easy to store.

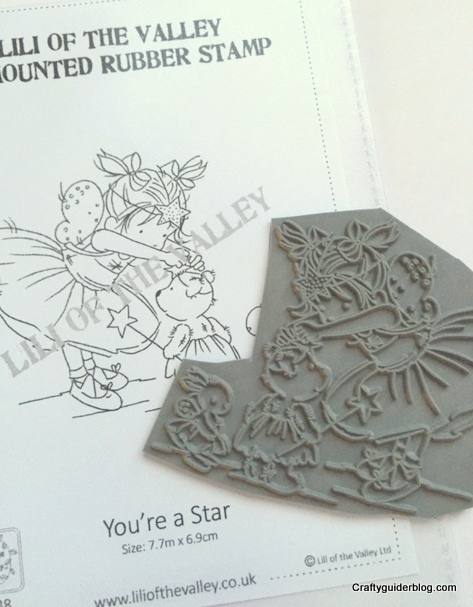
Sometimes though, you get lovely images on unmounted rubber stamps like the one above from one of my favourite stamp suppliers, Lili of the Valley.   They do have the storage benefits of clear stamps, but they need mounting before they can be used.

how to mount a stamp stick to mounting foam
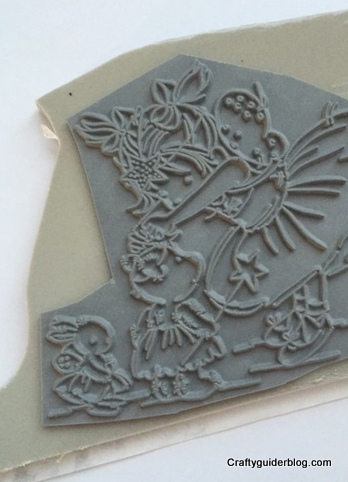
You need to buy some mounting foam which has a permanent adhesive on one side, and a cling surface on the other.   I had an offcut (the light grey in the picture) which fitted my stamp, and I fixed the stamp to the permanent adhesive side.how to mount a stamp trim excess
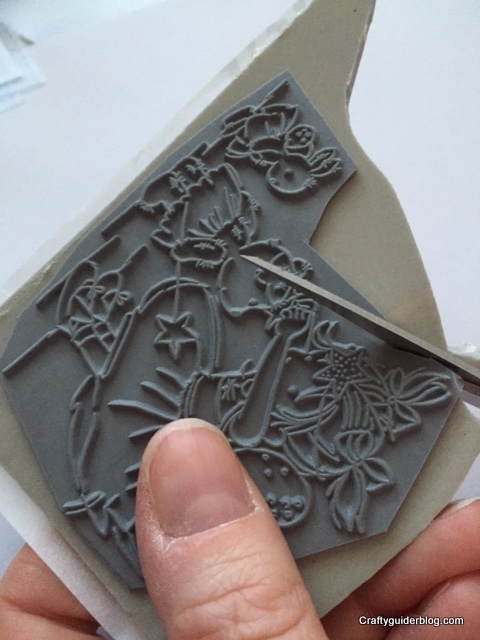
To ensure a clean stamped image, carefully trim the excess foam and rubber leaving a small border around the edge.  Non stick scissors are good for this.   It helps avoid those annoying smudges at the edges of stamped images where the ink pad has caught the background as well as the raised image.how to mount a stamp trimmed stampThis is my trimmed stamp.   The foam backing gives an even image transfer as you can really squish it down when you stamp.how to mount a stamp finished stamp
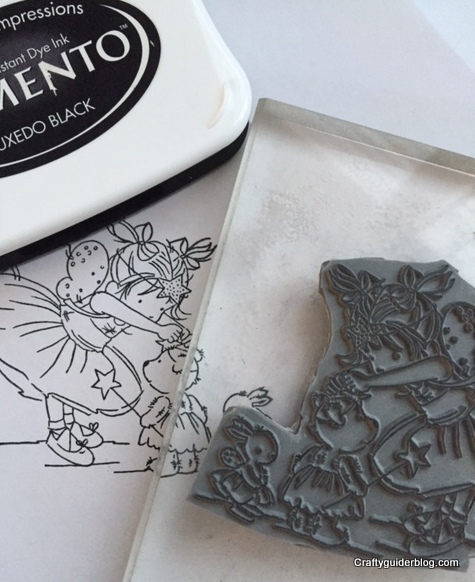
I use Memento ink pads when I stamp an image I want to colour in with my Promarkers so the ink doesn’t bleed.

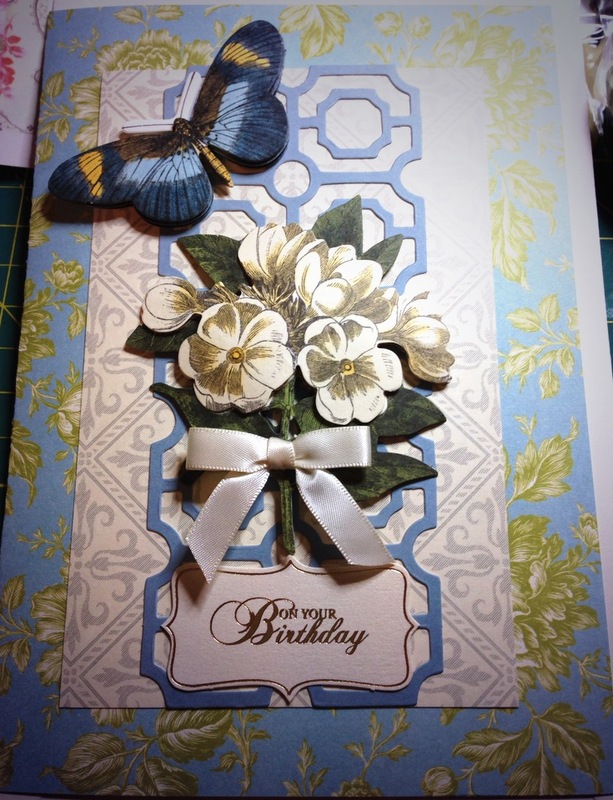
Isn’t it a gorgeous image?   It was chosen by youngest Craftyguidelet when she came to a craft show with me.   She’s got good taste!

Disclaimer: Any links contained in this blog are not affiliate links and I don’t get any money if you click on them.

Knitting and Stitching Show 2014

B L U E B E R R YIt’s that time again.   My annual pilgrimage to Alexandra Palace for the Knitting and Stitching Show.   This year I had to go on the Saturday so I could get someone to look after the Craftyguidelets and it was absolutely HEAVING!   I’m glad I decided to do most of my shopping on the first trip round, especially the fabric, as I could hardly move later on.Fabric stash knitting and stitching showThe blue fabric is gorgeous Liberty Tana Lawn and will become a blouse, and the other two are the softest knitted fabrics from Eternal Maker and will become pyjamas for the Craftyguidelets.   They sent me on a mission to get some fabric for their Elsa dresses but no one was selling any.   The nearest I found was a stand that had scraps of turquoise shiny scraps.   When I asked if they did bolts of the fabrics as I was making Elsa dresses, the owner looked at me in a puzzled way.   I clarified “Elsa, from the Disney film, Frozen”.   Complete blank look.   I’ve found the only person who has never heard of the film!Ribbon stash knitting and stitching showThese ribbons are from Crafty Ribbons.   I have some card designs in mind for the tape measure ribbons, and the others made up the multi buy offer.   “If I knit fast enough, does it count as aerobic exercise” and “Behind every knitter is a huge pile of wool” are two of the great quotes on the knitting one, and “Chocolate: here today, gone today” and “Chocolate…NOT just for breakfast” are on the chocolate one.Bead stash knitting and stitching showThis is my beading stash. The turquoise and white beads with the spacers are going to make the Craftyguidelets some Elsa jewellery with some snowflake charms I got before (spot the Craftyguidelet theme here!)   The others are kits from Spellbound Bead Company.   The Christmas tree earrings are a bit of fun for decorations day at school later in the year, the necklace looks stunning and the 3D stars will look great on my Christmas tree.Wool stash knitting and stitching showI blame this purchase on @Meanyjar.   She taught me crochet back in January and look at these gorgeous colours!   OK, I didn’t need much leading astray.   The colour selection was made by Attic 24 with Stylecraft for a crochet along later this month.   There were another 3 colour palettes but this was my favourite.   If the crochet along is too complex for my newbie skills, there are other patterns I can follow on Lucy’s blog.   My vision is of me crocheting a beautiful blanket over the colder months in front of the fire.   The truth may be lots of YouTube videos and frantic calls to Meanyjar for help!Foundation piecing landscape coasterI also did a workshop while I was there.   This is my start on a foundation pieced landscaped coaster, and this is the finished version I am aiming for by the tutor Sally Holman.Sally Holman landscape coasterIt was great to learn a new technique, and it was nice to have a sit down for an hour without lugging heavy bags around.Knitted pergolaThis knitted pergola was in the entrance hall.   The details were stunning.Knitted pond pergolaKnitted flowers pergolaKnitted blue tits pergolaThe birds are my favourites, especially the blue tit with the peanuts and the budgies!Knitted blue tit and peanuts pergolaKnitted budgies pergolaAnd this view has been in my top 3 for many years.   It used to be on my way home from my Saturday job working for my mum and dad in their bakery, and any excuse to divert to look at this view is worth it.Alexandra Palace view

January Review

And just like that, it’s the 31st January!   One month of 2014 has passed and the next 11 months are stretched out ahead, full of promise.   On the whole it’s been a good January for me.   I’ve felt a lot better (apart from putting my back out in the last few days), I’ve made decisions on what I want to do with the business and my blogging, and I’m in a positive frame of mind.
circle SBSJanuary started really well for me.   A couple of days after my birthday, I won a retweet from Theo Paphitis, and my twitter feed exploded with new followers and good wishes.
handmade birthday card flowers and butterflyI managed to get my craft on and make cards, get some scrapbook layouts made, finish some decoupage and get some sewing done.   It’s the most creative I’ve been for a long time.
crochet samplerI’ve also started crochet lessons which is something I’ve wanted to do for a couple of years now.   My doubles and trebles lesson was a bit more successful than my tea gloves lesson.   Perhaps it’s because I don’t drink tea, I just don’t have the tea gloves gene in me.
paper storageProbably my greatest achievement is to get more organised.   My magazine mountain is now a foothill, and several WIPs have been completed.   I’ve got a long way to go still, but with each mini breakthrough, I feel more weight coming off my shoulders.

How was your January?

Handmade Update

decopage bake sign


I’ve had a very productive few days.   I have organised, crafted, planned Brownie badges with eldest Craftyguidelet (Craft badge is first!) and decluttered.   However this morning I managed to throw my back out.   I was emptying the waste paper basket of all things!
decopage basicsAs we are having some work done on the house, I couldn’t go back to bed so I have been stuck at the kitchen table with my ibuprofen and heat pad.   I did manage to get my decoupage papers and mod podge out and I’ve managed to complete my “bake” sign for my kitchen.   I used the Hobbycraft Deco Mache papers which are really pretty, and chose the colours to go with my handmade place mats which use Cath Kidston spotty fabric.

What I really needed to do today was photograph and list my new handmade cards.
decoupage flowersOn Sunday I had a play with some Anna Griffin papers.   Look at the wonderful vintage images of flowers I was working with.   I’ve got a huge pile of cards to list for all sorts of occasions so keep an eye on the website.

This is one of my favourites.   I love the blue tones on this birthday card.
handmade birthday card flowers and butterflyI also used some of my craft themed supplies.   This one uses a Sizzix die for the mannequin and some swirl dies that I bought a long time ago and have never used.
handmade card mannequin detailI have also been doing my crochet homework.   Regular readers would’ve read about my lesson with Jean-Mary at Betty Makes where she managed to tame my disobedient crochet hands into yarn holding, treble making, crochet wannabees.
crochet samplerStill a bit wobbly, but look!   It’s crochet!   I haven’t counted my stitches or rows, but I think the technique is coming.
crochet edgingI’ve even tried the edging.   It’s loops!   The pattern became a bit of a foreign language after this so it’s not got much further.   Jean-Mary says I need to treble in my loops.   Hmmm.   Might get a translation and a few pointers tonight if my back will let me go to my lesson.

I’ve also managed to keep up my decluttering in January.   I’m still on track with my challenge to recycle a magazine a day.   The pile is going down.   I won’t have finished a WIP a week though unless I get a sudden surge of creativity in the next few days, but I am getting more organised.
paper storageMy loose crafting papers were in a box that was too heavy to get down from the shelf every time I made a card.   I managed to clear a space in a filing cabinet by turfing out some obsolete Guiding paperwork, and put the papers into files by colour.   I might actually use them now!   I’ve also sorted through my 12″x12″ scrapbooking papers and managed to do 3 scrapbook layouts.   No pics as I generally use photos of the Craftyguidelets in my scrapbooking, but it’s been really nice to have a look through images of them as babies (yes, I’m that far behind!).

It’s been a really productive January, so hopefully my back will clear up quickly and I can carry on.   I’ve got plans for February too to keep 2014 as a positive year for change.

Linking with Handmade Harbour’s Handmade Monday.

Beginners Crochet Class at Betty Makes

Red floral crochet hook roll

For the last few years I have wanted to learn to crochet.   I own about 10 hooks for some reason, I’ve got the books, I’ve made a crochet hook roll, but I’ve never progressed very far.

A couple of years ago I met up with Jean-Mary (@meanyjar) at a craft show.   We had been tweeting for some time, and after some retail therapy, we sat down for some lunch.   After a chat, she set about trying to teach me some crochet.   To say my hands were not designed for crochet was an understatement.   Just holding the yarn was a problem, holding the hook wasn’t much better, and then moving the hook…you get the picture.

Despite this experience, Jean-Mary went on to open Betty Makes to teach her crafty skills to others.   I signed up for her crochet course which takes students from beginners, learning new skills and stitches, through to the granny square.

Lesson one started with picking up a small sample of crochet already started by Jean-Mary and working doubles into it.   Having someone else’s stitches to work into was a lot easier than my first foray where my tight foundation chain was not having any of it.   A couple of rows of doubles later, (and holding the yarn properly for the first time ever!) I was doing trebles.   The satisfaction as my wonky, uneven mini sample grew was fantastic.

beginner crochet sampler


Next we moved on to working from a pattern.   I have discovered that it is hard to count to 29 when you are busy chatting and drinking tea, but my pot holder is growing nicely, albeit having gone down to 23 stitches somewhere!

beginner crochet pot holder


The cost of the course includes the hook, pattern and wool, so I have 2 weeks to practice my neatness and counting at home, before I go back and learn more.   Next lesson includes making some tea gloves.   Depending on my technique, I’ll either wear them myself or end up giving them to the kids if I drop too many stitches!

Are you learning a new skill in 2014?