Lino Printing Workshop

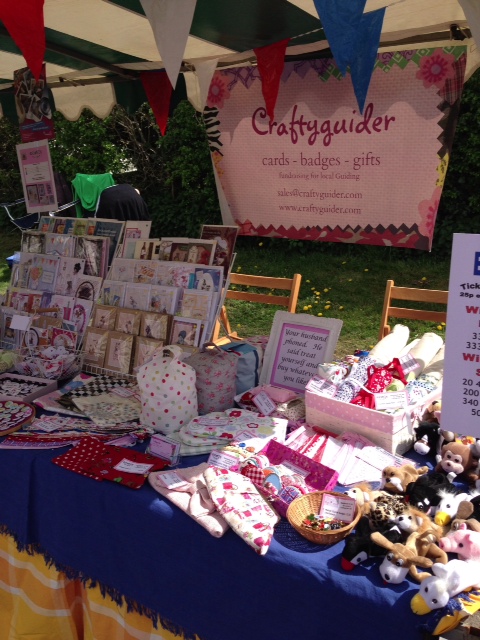
I’ve been holding a weekend free in my diary for a few months.   It was originally destined for a tweet up with a few crafty twitter friends, but unfortunately it was not to be.   Faced with this weekend where I had already arranged for hubby to be free to look after the girls, I decided to make the most of it and tweeted the talented (and busy!) @meanyjar to see if she’d like to do something.

photo (94)


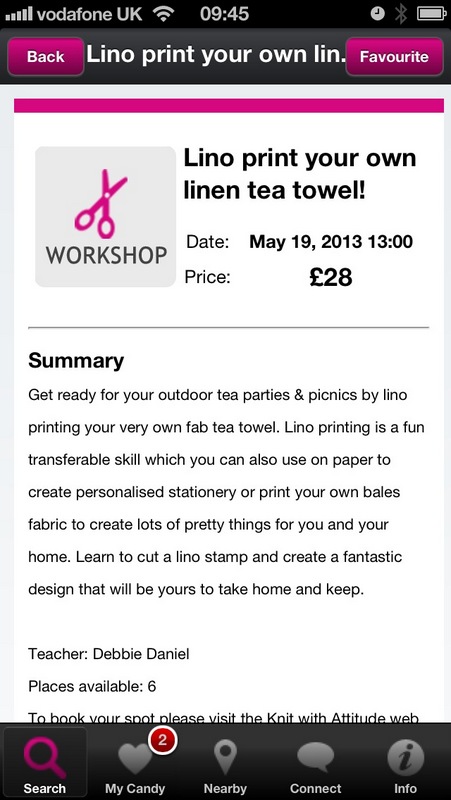
Using the Craft Candy app, I managed to find a couple of workshops just to see what was out there, and we both thought lino printing would be different and fun to try.

We met up in London and found the Knit With Attitude shop in Stoke Newington High Street (via a crafty shop and lunch – priorities darlings!).   There were two others on our course, and we went to the back of the shop where we were kitted out with pencil, paper, a piece of lino to sit on (warm lino is easier to cut), tools, inks and a roller.

My 6 year old Craftyguidelet suggested I do a twitter bird as she knows Meanyjar is one of my twitter friends, so I tried two birds sitting on a branch.   I then transferred the basic design on paper to the lino and got hacking.

With lino printing, it is important to realise that your design will print in reverse, and that the bits you cut out won’t take the ink and will be white on the fabric.   When I was at school, I learnt the main rule of lino cutting – cut away from you so that stray, sharp tools don’t cut through your thumb nail and take weeks to grow out and heal.

I wanted to put some texture into my design which took a lot of thinking about, but I came up with this as my test print.

photo (93)


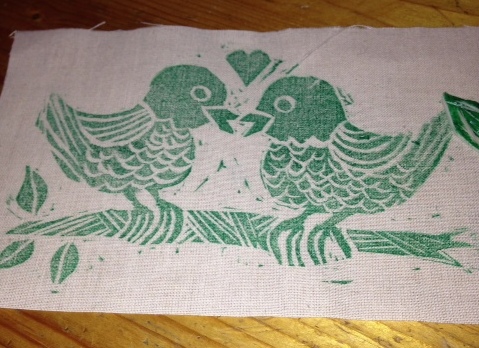
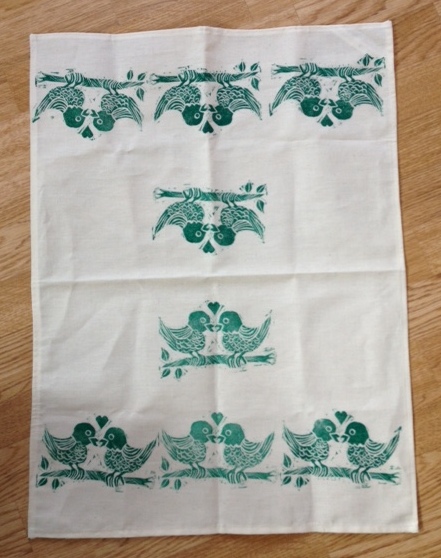
The acrylic ink was mixed with a medium to make it set on fabric, and I then plucked up courage to put ink to tea towel and came up with this.

photo (92)


It was such a good skill to learn with others to bounce ideas off of, hints and tips from the instructor, and a table that didn’t mind a bit of spilt ink or an accidental gouge from a cutting tool.   Anyone who normally gets an anniversary card from me may see this design on their card soon, and my Christmas cards may be lino printed.

Another new craft skill to add to the list!   Have you tried anything new recently?

Linking to the Handmade Harbour Handmade Monday blog.

Glue Guns and Buttons

photo (84)


I love buttons.   Aren’t they just so pretty?   I keep mine carefully sorted by colour in a clear box and have far more than I will probably ever use.   I’ve hacked them off of old clothes, bought in bulk at craft fairs, inherited them, and just bought them because they are gorgeous.

photo (87)


I have also accumulated lots of findings too.   And I now have the missing link to unite the two; a hot melt glue gun from Hobbycraft which was one of those “put it in the basket and you can have it for your birthday” presents.

With the stall at May Fair needing stock, and my craft stash needing using, I set about crafting.

I made two brooches from large buttons I’d collected, but ran out of time to make the covered button brooches I’d planned.

photo (86)


I also made some rings, which involved using some of the scrabble tiles I’d bought.

photo (85)


These are all I have left after May Fair.   The brooches and rings will be listed on the website soon.

photo (83)


What are now listed on the website are my hair clips (at least those that I didn’t sell already!).   My girls keep wanting to claim them though so I’ve had to pack them away.   These are a few of my favourites.

IMG_7777 IMG_7770 IMG_7788IMG_7790


May Fair – Craft, fudge and lots of cake

Yesterday was the annual Standon May Fair.   As usual I had my Craftyguider stall to raise funds for my Guide group.   As well as this, I am a mum of two girls at a school that has a cake stall there every year that parents donate cakes to, a WI Vice President with our group running a stall with free cake and some sideshow games, and a Rainbow Guider of a unit which sells fudge.

I’ve been rebuilding my stocks of craft items that sell well at this event, so over the last few weeks I’ve been getting to grips with my hot melt glue gun, making badges and fabric mirrors, and getting some new greetings card designs made.   I’ve also got new point of sale materials, organised the float, and made sure the string and sellotape were packed.

photo (82)

I think it turned out very well, and we definitely had a successful trading day.   Two of my Assistant Guiders helped me during the day, one staying from set up to shut down, and two of my 30 Guides helped sell at points during the day.   Other Guides passing the stall were made to come and spend money!

The WI were doing a Guess the Weight of the Cake, Guess the Number of Buttons in the Jar (one of our secretaries counted over 3000 buttons into a jar!), and Guess Where Jess the Cat Is game for the kids.   They made a fabulous job of making the stall look gorgeous, talked to passers by and got quite a few women to sign up.   Members also contributed cake to be handed out free.

photo (81)

As I love baking, I made a couple of tray bakes for the WI stall.   The other 4 cakes in the picture went to the school stall.   I had a text from a mum saying that they may be abandoning the stall as the number of cakes donated at school were really down.   I bought a few extra ingredients and doubled my donation to 4 cakes.   I hope they did well.

The 4th stall I contributed to was the Rainbow stall.   As the Rainbow leader couldn’t cut fudge this year, I organised some mums to come round to mine to chop it up and weigh it into individual 100g bags.

photo (80)

After 2 hours, we had it all finished, and the fudge sold out in record time.

Thank goodness for the lovely British bank holiday weather!

#prettyflowersallinarow Swap

The fabulous @sazybsarah on Instagram (@sazyb123 on twitter) started up a swap on IG with the hashtag #prettyflowersallinarow to try and bring some floral loveliness to instagram when the weather was anything but lovely.

photo (63)

I was paired with Christina @applecrispcraft who states on IG that she is a ‘lover and maker of all things fabric’.   This proved to be a bit of a challenge as we were tasked with providing our swap partners with a craft other than the one our partner does.   As sewing is my standard trade, I ventured back to papercrafting as my main craft.

photo (62)


These cards were decoupaged using Anna Griffin papers and definitely fulfilled the floral brief.

photo (61)


I had to use some fabric though so I included a handmade Cath Kidston fabric mirror and a patchwork lavender sachet.

photo (64)

My bought gifts were a couple of fat quarters picked up from my local habby and a vintage embroidered brooch from my local dress agency and vintage treasures shop.

And this is what I got in return!   Look at the beautiful wrapping paper.

photo (79)


The gifts inside are gorgeous.

photo (78)


A fabulous handmade cushion embellished with buttons and ribbon, some Cath Kidston soaps, a pretty floral tin with flower buttons inside, a floral mug and some cottage garden seeds to plant.   Such a thoughtful gift.

Apple Crisp Craft sells lovely fabric goodies on Etsy.   Go and have a look.

Summer Swap

Whilst browsing Instagram, I spotted that Emma @lemonadeyarns (@lemonade_yarns on twitter) was having a summer swap.   I definitely didn’t feel summery at the time so it was a fabulous idea.

photo (71)


It was a ‘secret santa’ style swap so our partners didn’t know who was going to send them gifts, and someone different received what we sent.   I was given @veggiechicken to send gifts to.   Her profile states that she is a vegetarian and animal lover (especially spaniels and chickens), and stalking her IG feed, I spotted that she crocheted.

photo (66)


I had this strawberry fabric in my stash and added a pretty polka dot lining to make a crochet hook case.   I’ve just noticed that I put my label on it so hardly secret Santa when she opens it!

photo (72)


What could be more summery than strawberries and cream?   This is a fabric covered mirror I made using a remnant I picked up some time ago.

photo (68)


My final craft was two cocker spaniel notecards that I made with flowery kraft and gingham papers.   It was a bit of a stretch to connect with the summer theme, but I thought summer flowers and picnic baskets were vaguely right in order to get the gorgeous dogs in the swap.

photo (67)


My bought gifts were some ice cream flavoured lollies, a strawberry scented fragrance diffuser and some summery coloured muffin cases.   I hope she bakes!

Handmade Cards

One of the first crafts I did on a large scale was card making.   I designed and made all my wedding invitations and acceptance cards, not as a cost saving exercise, but because I wanted the challenge.

I spend a lot of my time on my sewing machine, but I do have paper crafting sessions where the sewing machine gets relegated to the floor (shock, horror!) and I cover everything in ink, glue and bits of paper.   I always send handmade cards to friends and relatives, and my girls always hand make any cards for close relatives and their friends’ birthdays.

With May Day approaching which means a stall at the local fair, I’ve been making cards.

IMG_7709


I downloaded the designs to make this card from Printable Heaven some time ago as men’s cards are always tricky to think up.   The elements are combined on a sheet for you to print, cut out, and in this case fold, before assembling them on the card.

photo (76)

This card was made using a die cutting plate from Hobbycraft.   I love the design, but it is a pain to use in my Sizzix Big Shot.   I just can’t get it to cut cleanly yet.

photo (73)

Another Printable Heaven selection.   These 12 toppers will become cards tomorrow specifically for Craftyguider stock.   The dogs are adorable, and hopefully lots of dog lovers will visit my stall!

IMG_7734IMG_7717


These two are also Printable Heaven designs based on the old cigarette card collections.   The muted backgrounds are really effective with the cards on top.

photo (75)

And I still have some way to go.   I’ve unearthed my stash of toppers I’ve made up but never used.   It’s time to use them!

Linking to Handmade Harbour’s Handmade Monday.

Gluten Free Baking – Cake Angels

Over the next week or so I will have to bake a lot for the WI and school stalls at the local May Day celebrations, as well as when I host some Rainbow mums chopping fudge for the Rainbow stall (as bribery!).   This is in addition to preparing for the Guide stall when I will be selling my Craftyguider goods (no cake involved!).

As a warm up, youngest Craftyguidelet and I made some raspberry and white chocolate muffins.

photo (70)


As daddy is gluten intolerant, we try and make gluten free cakes.   An excellent purchase recently was the Cake Angels book by Julia Thomas.   In the past I’ve used (and loved) Phil Vickery’s Seriously Good! books, but the recipes require blends of different flours, some of which need to be bought online from shops that charge large p&p rates.   The Cake Angels book uses standard gluten free flours available from most supermarkets.

photo (69)


The recipe is for both dairy and gluten intolerants, but as dairy isn’t a problem in our house, I just substituted standard yogurt, chocolate and butter.

photo (65)


The batter looked a bit strange when it went into the cake cases, but the finished result was lovely.   Little Craftyguidelet was very proud serving them to the family.

Julia Thomas started her dairy free baking following cancer when she was expecting her first child.   She then moved on to gluten free baking when a friend asked for gluten and wheat free cakes for her son.   She developed a bespoke baking service and couriered cakes to customers, before putting some of her best recipes in her Cake Angels book.

So far I’ve tried the Chocolate banana loaf, Lemon loaf, Sticky toffee traybake, Chocolate brownies, Lemon butterfly cakes, and Almond and cherry cupcakes, and all have turned out well.   You really don’t miss the gluten.

If you want to bake a cake without dairy or gluten, most cakes have a version contained in the book.   There are even frosting recipes at the back.     It’s a really good starter book for baking for intolerances, and as long as you can get hold of some xanthan gum which adds texture to the gluten free flour, you should end up with a great result to satisfy both intolerants and gluten eaters alike.

I bought this book myself and all opinions expressed are my own.   The only benefit I have had is the delicious cakes baked using the recipes!

Fabric Covered Mirrors

With craft fairs coming up, my next at the Standon May Day, East Herts on the 6th May, I need to get a move on and make sure my stall is ready.

photo (59)

I think 7 handbag mirrors won’t last me very long so I opened up my freshly stuffed scrap bag and started cutting and assembling.   With so many fabrics that I love in there, I ended up with quite a few choices.

photo (60)


My Russian doll fabric has been very popular and I’ve made 2 bags and a few mirrors in the past from the small piece I had.   I’ve managed to get three mirrors out of the rest and I think that’s my lot now.

IMG_7689

And these are a few of my other favourites.

IMG_7702Everyone loves a nice polka dot!


IMG_7705I love this design.   It was a piece left over from some Christmas bunting but it’s gorgeous on it’s own.


IMG_7697This reminds me of a summery picnic.


The full selection of designs are on my website, and as always, all profits go directly to my Guide unit.

Which one is your favourite?


Graceful Kelly Bag

I can’t remember which came first – the handbag frame or the pattern.   But whatever it was, I came to be the owner of a Graceful Kelly purse frame and free downloadable pattern from the U-handbag website.

I have made a few of Lisa Lam’s designs before and I am challenging myself to make one of each of the bags in her ‘A bag for all reasons’ book.   This is going quite slowly as regular followers know I get distracted very easily!   I have completed three out of the twelve, plus frame purses and sugar loaf pouches.

In my quest to mop up some of my WIPs, the bag frame surfaced.   I have many fabrics bought because I loved them but didn’t know what to make with them but had to have them anyway.

photo (57)


This gorgeous sewing themed fabric was bought from last year’s Knitting and Stitching show (if anyone knows who stocks it, please let me know as I need more!).   It had to be used for something I was going to keep rather than a Craftyguider item so it became a bag!

photo (58)

The only type of ironing I enjoy!

photo (55)


The antique finish frame goes really well with the vintage sewing theme.

photo (56)


There is acres of room inside as the bag is gusseted, and there is a handy elasticated pocket in the lining which I chose to divide into three for phone storage.

The pattern was easy to follow as I’ve made a few frame purses and bags before.   I’m definitely in the mood to make some more when I’ve got a few things out of the way.

What do you think?


Linking to Handmade Harbour’s Handmade Monday

Pin Badges

One of my many sidelines on the craftyguider website is making pin badges on my badge machine.   I have three dies – 25mm, 38mm and 58mm – and I love upcycling pictures, maps and making my own designs.

These badges were made for my Rainbow unit as the leader had come up with the idea of having little groups for activities based on the Rainbow Magic fairies.   Rather than just have the colours, I copied some pictures from my daughter’s book and came up with these.

Recently I’ve been asked to produce some hen night badges for two different hens.

Hen party one was themed on the Miranda TV series.   The hen is a regular customer of mine from twitter for various badges and sewn items, so it was wonderful to play a part in her celebrations.

Each person on the hen do would be given 4 badges as a gift.   An evening in front of the TV pinging designs back and forth on twitter produced these designs.   One dodgy shoulder and 84 badges later, our hen had a bag of badges to dish out.

Hen party two found me on a craft stall at a local fete.   She had been a Guide at the unit I now run, and her friend was getting married.   As all the profits from my sales go to the Guide unit, she was happy to place an order with me.   She had even dreamed up the artwork which was fabulous.   It was a Guiding theme with all the participants in the hen’s patrol, and the hen had some interest badges to earn for her badge sash.

All I had to do was convert the artwork and produce the badges.   I wish I’d had this idea when I got married!

My badge machine gets a lot of use with name badges for my WI, a badge making activity at school craft club, business logo badges for people to use at craft fairs and trade shows, and badges for all 300 participants at school sports day, as well as making badges and fabric covered mirrors for sale at craft fairs.

What would you have on your personalised badge?