Simplicity 5540 WIP

I am the WIP (work in progress) Queen.   I have drawers and boxes of the stuff.   You can hardly move in my office, spare bedroom and wardrobe for fabric, Christmas crafts, Guide crafts, kits off the front of magazines, paper, card, lino printing, stamps, embossing folders, ribbons, buttons, thread, bobbins…   Got the picture yet?

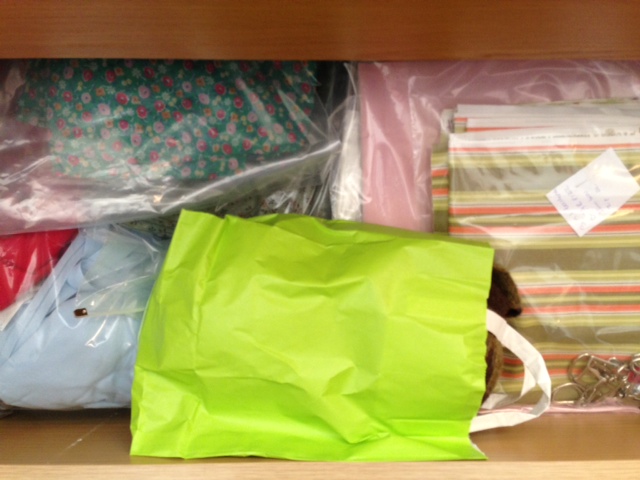
This drawer contains a dress that needs mending, several bag making projects from my ‘make every bag in the Lisa Lam book‘ quest, a couple of dress patterns with fabric, fabric to make Olivia the Rainbow Guides mascot a new uniform, and some big knitting.

drawer 2

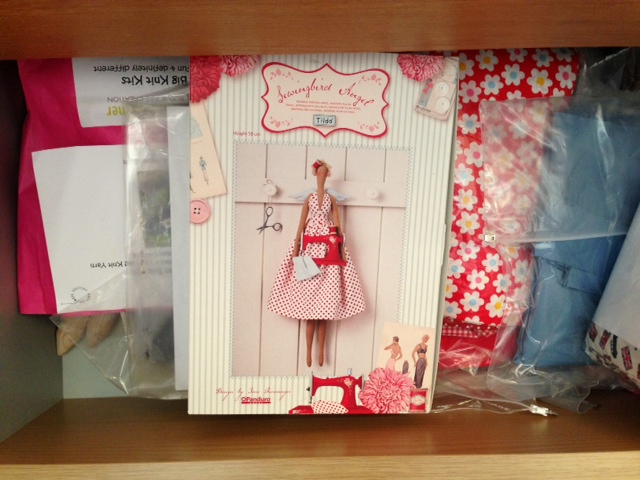
This drawer has more big knitting, a Tilda Sewing Angel, more dresses, a cancelled Craftyguider order and loads more.

drawer1The drawers are full, and do not include all the ‘buy a metre of fabric to use for a project that may come up one day’ projects.   I did manage 4 months of not buying anything unless it was specifically to make something, but after April, I was back on the treating myself slide.

Anthea Willis (@ForestFlower23 and Tales From Mount Pleasant) has a similar addiction to mine and has started a #WIPslinky party on her blog on the last Tuesday of the month.   She’ll show you hers if you show her yours.

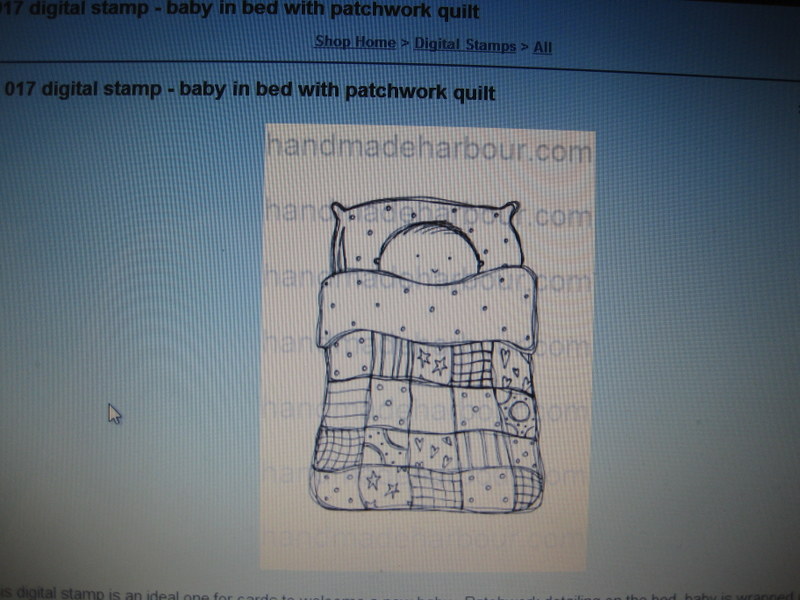
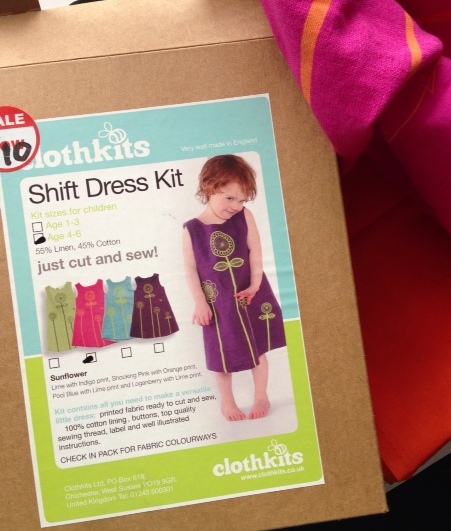
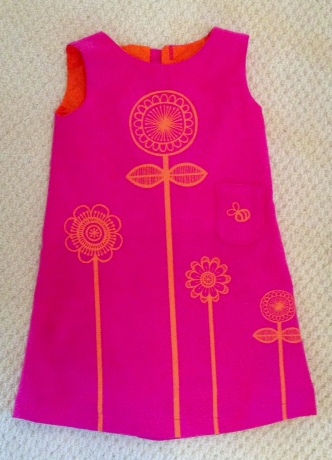
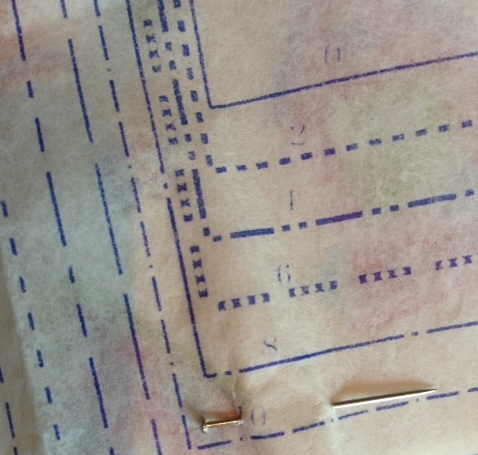
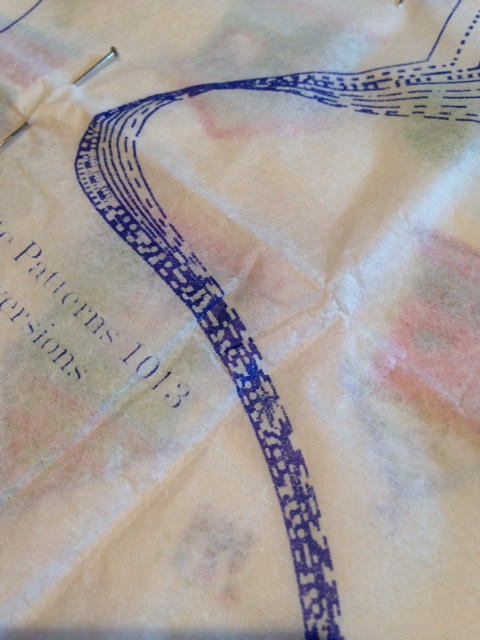
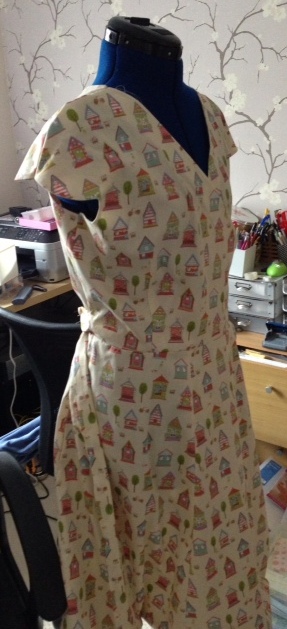
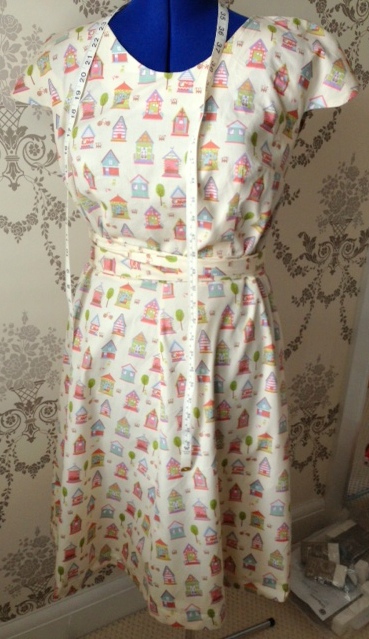
My first entry is Simplicity pattern 5540.   It should look like this…

pattern girls
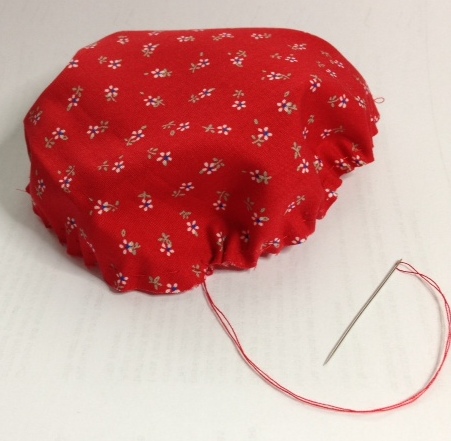
…but for the last couple of weeks mine has looked like this.

dress bits
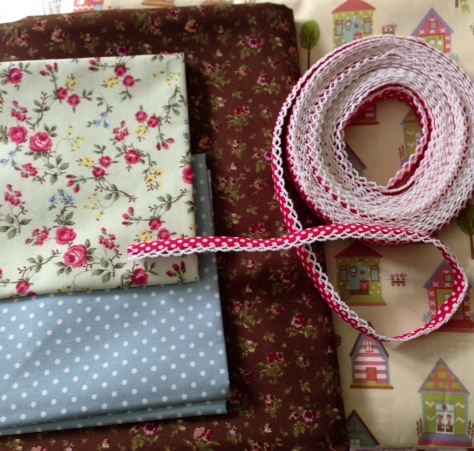
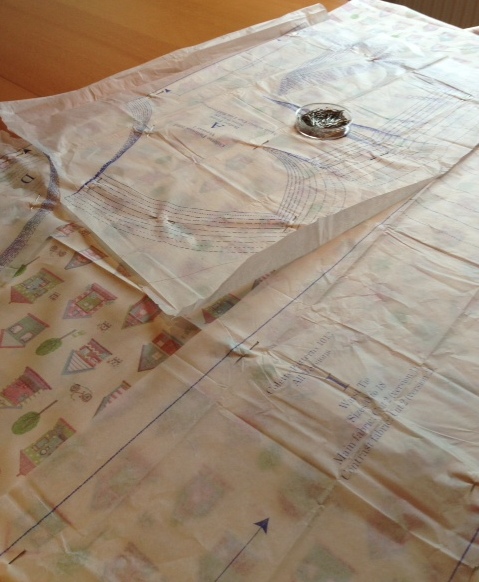
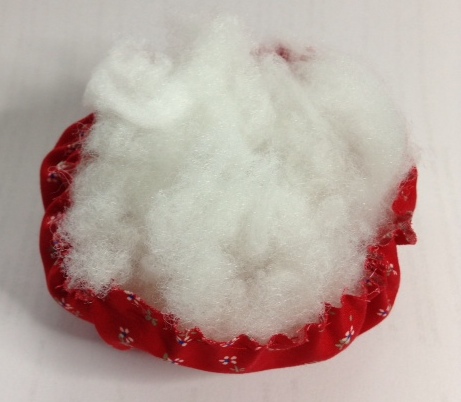
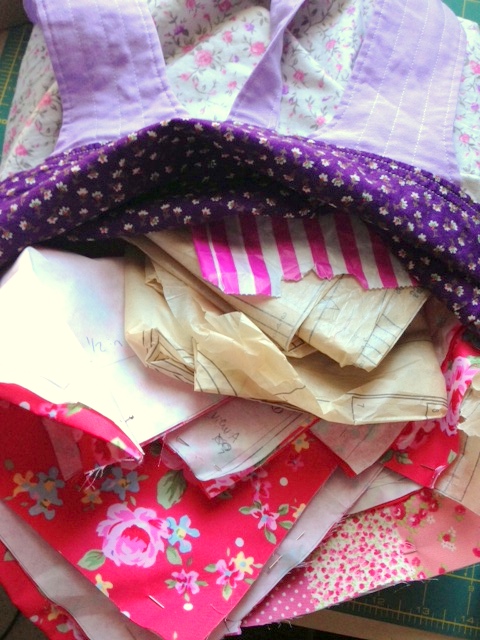
This is two cut up dresses; one each for my 6 year old and my 4 year old.   I need to get a move on or a) there will be no more summer and b) the girls will grow out of them before the first stitch has even been sewn.

Hopefully I will be able to post a picture of the finished garments soon and then I will be back on the last Tuesday in August with my next WIP to complete.

Anyone willing to share their WIPs, head over to Anthea’s blog and link up.   See you there!

Follow on Bloglovin

Crafty Creatives Box 13

I’ve been subscribing to the Crafty Creatives boxes since box 2.   I missed box one which was floral themed, and now their birthday box, box 13, is a flower fest.

IMG_3389Normally the boxes are made up of an art card, some themed craft supplies and a kit.   However this special birthday box has 5 kits for different flowers, plus some other goodies.   One item that wasn’t photographed was the birthday balloon.   With 2 Craftyguidelets in the house, this was nabbed as soon as I opened the box.

The first kit involved changing this pile of goodies…

IMG_3393…into this lovely stocking flower.

IMG_3400I’ve still got enough bits to make more, and I’ll be on the lookout for some cheap coloured tights for different colours.

Next up I powered up the glue gun to make the felt flower.

IMG_3403I just don’t think this came out very well.   Added to this the fact that I managed to burn my finger on the glue, it was my least favourite project.   I might save the orange felt sheet for something else rather than making another one.

Next came the paper rose hair slide.

IMG_3406I’ve made flowers like this before, but I don’t think I’ll be making it into a hair grip.   There are some lovely beads in previous boxes that I haven’t used yet that may become hair clips instead.

Finally came the crepe paper flower bunch.

IMG_3405This was my second favourite project after the stocking flower (once I’d juggled various pots of PVA and dug out nozzles with bent paperclips).   I might make this into a lollipop tree using a thin piece of dowelling and a pot.

The last kit is the French beaded flower.

IMG_3411This requires more time so it’ll be kept for another evening crafting session.

I’m still left with some other goodies to use up.   Probably some necklaces and some papercrafting in the future.

IMG_3413I have had fun with this box.   I’ve made more than usual because it’s been kit-based, but I think I prefer the normal format.

What would you do with the bits I’ve got left?


Linking up to Handmade Harbour’s Handmade Monday blog.

Handmade Harbour

Digi Stamps for Beginners – tutorial

I like making cards.   It’s one of the reasons that Craftyguider came into being.   I had so many things I wanted to try, and not enough friends and relatives to send cards to!   I can now make what I want, when I want, and any cards that aren’t intended for a specific recipient, go into my shop stock.   I sometimes raid my stock for cards too as everything I make is the same quality as I would use for my best friend’s card.

IMG_8180personalisable car card from craftyguider.com

One of the techniques I’ve never used is digital stamps.   Some of the paper crafters on twitter rave about them, but I’ve only ever used the stamps you ink up and print yourself.   Digi stamps provide the same outline image as an inked stamp, but they differ in that you can manipulate the image, for example by changing the size or flipping the image.   There is no physical stamp to store either as, once purchased, the image is emailed to you to download and store on your computer.

Handmade Harbour has come into the world of digi stamps in the last few months.   Wendy Massey has many gorgeous designs for almost every occasion to purchase and use to make cards.   She recently offered bloggers the opportunity to use digi stamps in a tutorial, and I was lucky to be chosen to receive a selection.   This will be the first time I’ve ever used digi stamps so this is a true beginners guide.

1. Obtain your digi stamp.   I chose this cute baby in bed with patchwork quilt as there are a number of babies due to friends and family in the next few months.

IMG_3367

2. Save the image that is attached to the email you receive to your computer.   I am no techie, but I managed this without help.   Going well so far!

IMG_3371

3. For simplicity, I copied and pasted the downloaded image to a new Word document.   I only needed to change the size and didn’t need any accurate dimensions.   It was my first attempt and ‘ish’ was good enough.   I based my design on a sketch from a Craftwork Cards Recipe Card from QVC.   Even though my card will look nothing like this, the elements I use will fit the sketch in the top right hand corner.

IMG_3369

4. Print the design onto good quality paper or light card.   Whatever you can get through your printer.   Trim the image leaving a border.

IMG_3374

5. And now the fun part – colour it in!   I love promarkers, but you can use whatever colouring method you prefer.   tip – I made a border around the edge using a ruler and a promarker so the image matched

IMG_3383

6. I printed another image slightly larger and used three squares as my accents.   I raised these and the ‘congratulations’ message using sticky foam pads.   tip – if you are posting your card, it’s cheaper to send if the image is flat rather than using foam pads

IMG_3385

7. Ta dah!   Now I’m going to hurry down the road to my neighbour’s house as she’s just given birth to a lovely baby girl.   Hope she likes it!

IMG_3387


I obtained the digi stamp for free from Handmade Harbour, but the words, images and opinions are my own.

Teacher Thank You Cards

Today’s Handmade Monday post is brought to you by the creative Craftyguidelets.

My daughters aged 4 and 6 have 9 teachers, teaching assistants, a nursery nurse and a trainee between them.   We always make cards and needed a new idea.   After an exploration of Pinterest, it seemed apples were the main theme (although try and explain ‘apple for the teacher’ to a six year old!).   With my new lino printing kit in it’s box, I felt a creation coming on.

card10

Firstly I found a cartoon apple shape to trace round as my drawing skills aren’t great.

card9


Then I traced the shape onto my lino.   I cut round the shape with scissors and warmed the piece with body heat to make it easier to cut.   Using the appropriate tools, I cut round the image and then added a small ‘shine’ detail.

card8


I then trimmed close to the image with scissors.

card7


Then it was over to the Craftyguidelets.   We applied the ink to the lino with a sponge to get an even coverage.   Unfortunately the printing ink I bought was very tacky and didn’t cover very well, even though it was specifically recommended for lino printing.   It printed unevenly which is OK for the work of a 4 year old, but not for me as I wanted to use it for printing cards for sale.   Also, it still hadn’t dried properly after 36 hours.

card6


The lino was rollered down by myself and the Craftyguidelets to try and get an even print but to no avail.

card4


The girls cut out the apples (getting covered in tacky ink as they went!).

card5


They then stuck the apples to some kraft cards, added a hand drawn stalk and a green paper leaf, and a ‘thank you’ message.

card1


Just a matter of writing to all the teachers (the 4 year old wrote in 7 cards for all her helpers) in their bestest handwriting.   This is the 4 year old’s bestest writing.

card2


And ta-dah!

card3


Just 9 lots of teacher gifts to do now.   Best get baking!

What are your best ideas for teacher cards and gifts?

Clothkits Shift Dress

Very occasionally (ahem!) I visit Hobbycraft and buy essential (ahem ahem!) crafting supplies.   One essential purchase was a Clothkits shift dress kit in the sale section.

box


The price was reduced from £19.99 to £10 which was at a level where even a finished dress would be as expensive.   They had an age 4-6 pack in youngest Craftyguidelet’s favourite pink colour so into the basket it went.

Clothkits contain everything you need to make the dress.   In this one there were buttons, thread, lining fabric and printed fabric with all the pieces marked out in the three sizes.   The fabric was used as a pattern for cutting the lining, and the instructions were really clear.   Even after sewing one shoulder seam back to front and then inside out, I still managed to complete it in an afternoon (along with all the normal school runs, meal preparation etc.).

flat finished


I can’t believe how professional it looks!   Most importantly Craftyguidelet loves it and wore it the following day.   It survived a pretty hectic day in Legoland and is currently in the washing basket waiting for it’s next test.

The only criticism I have is the lack of size information to say what Clothkits consider the actual measurements of a 4-6 year old are.   Craftyguidelet is a slim 4 year old but I made the dress in a 5 year old size to give her room to grow into it.   I would say that it fits her now so perhaps I should have made it in age 6.

My only problem now is that my 6 year old wants me to make her a dress.   Back to the cutting table I go.

Linking to Handmade Harbour’s Handmade Monday as usual.   Pop over to see what other crafters are getting up to.    Also linking to Crafty Girl Linky Party on EverythingEtsy.com for the first time.

Colette Crepe Dress

Why do all my crafting blog posts start off with “I started this a few years ago” or “I bought this some time ago”?   I suppose it’s a good thing that I’m now getting through all my projects!   This project for Handmade Monday is a relatively new one but one which has taken longer than planned.

When I was younger, I made a lot of clothes.   Skirts, dresses, waistcoats, tops, trousers all came off of my sewing machine.   4 episodes of the Great British Sewing Bee later and I’m back in the chair.

I’ve been admiring Colette patterns for a while so I chose a particularly gorgeous looking one and started shopping for fabric.

pattern

I am a fan of the lovely Kath at Sew La La and would buy bolts of fabric from her if I could sneak it in past the husband.   This dress needed something pretty so going to the home of pretty fabric was all the excuse I needed.

sewlala


As you can see, I may have strayed off the brief and also bought some fabric for a skirt, and some fat quarters and binding which I’m sure will come in handy for something one day!

The pattern was a bit of a disappointment.   Although the instructions were shown in a book which is much better than the standard huge piece of paper, the tissue pattern itself was a pain.   This photo is a close up of the numbers.   I know my eyesight isn’t 100%, but the numbers are really poorly printed.

crepe numbers


And which line do I cut along exactly?


curve


Nevertheless, I managed to cut the fabric and worked out the new cutting layout as I was using a directional patterned fabric.

pinning


I made sure I measured myself according to the US size charts, but even then I found my top, middle and bottom were 3 different sizes.   Without a dressmaking dummy, it was difficult to try and fit the pattern to my weird size and I ended up having to adjust the shoulders by 2″ which has meant the rest of it isn’t perfect.   With the addition of a husband who has a knee phobia, getting a hemline pinned was impossible.   Therefore enter Felicity.

form

This shot is before I fattened her up to my size and lent her some underwear to increase her bust to the size of a woman in her 40’s who has fed two babies.   Felicity is still rather perky, but with a bit of padding, I’ll sort her out.   Hopefully if my diet and exercise gets back on track, I’ll be gradually winding in her size before too long.

And here it is.   Hemmed and pressed.   Hopefully I’ll look as good as Felicity does in it.

finish

I’ve got two more dresses and a skirt, plus lots of Craftyguidelet clothes to make now.   I’m really excited to get back into dressmaking again.   The bug has bitten.

Linking to the Handmade Monday blog where you can see what other talented crafters have been getting up to.   And if you’ve found my blog through Handmade Monday, why not click the Bloglovin’ button on the right to follow my blog and see what else I get up to.

WIP Busting Cross Stitch

A few years ago I spotted a cute Winnie the Pooh themed cross stitch that could be personalised.   “That’ll come in handy” I thought as I put it in my basket.

Turn forwards to 2013 and it looked like this.

jwip1


The design had more flowers cascading up and down from this central portion, but by this stage, I was screwing my eyes up at the pastel flowers seemingly blending into one, and having tried backstitching around the flowers (have I moaned a teeny weeny bit about backstitching before?), I decided to just concentrate on this central oval.

Progress on what was left was a bit haphazard.   Having looked at the backstitching diagram, and not being able to tell where pastel yellow one finished and pastel yellow two started, I sort of made it up as I went along.

jwip2


With the deadline of my latest Godson’s Christening looming, and my new Motivated Mum mentality, I beavered away and finished.   All that was left was to decide how to frame it.

jcompare


Twitter and Instagram came to my aid and 100% of people who expressed a preference voted for the hoop.

Ta dah!

hoop


The Christening was lovely.   My Godson behaved himself impeccably and I had a lovely snotty cuddle.

And every present needs a card.   This was finished weeks ago.   I’m not last minute with everything!

jcard


Linking to the Handmade Harbour Handmade Monday blog.   And while you are there, look at her new digi stamps!

Motivated Mum

motivated  past participle, past tense of mo·ti·vate (Verb)

Verb
  1. Provide (someone) with a motive for doing something.
  2. Stimulate (someone’s) interest in or enthusiasm for doing something.

In the past, for various reasons, getting motivated wasn’t easy.   There is always the eternal competition between what I want to do, what I should be doing and what I have to do.   If I don’t want to do what I have to do, I get resentful because it’s stopping me doing what I want to do, and if I do what I want to do, I get a guilt trip because what I should be doing isn’t getting done.   All in all, I end up in a mass of doing nothing at all.   Still following?

It also makes me a bit lastminute dot com.   Guides is on a Wednesday, so I end up taking ages to get down to planning things because Wednesday is so far away isn’t it?   Surely I can squeeze in a few more wants and shoulds before this have to?   Then I’m racing around on Wednesday itself to get something ready (as well as doing Craft Club, looking after the Craftyguidelets, cooking dinner and all the other things that come up).   Thursday is Mother-in-law day and Rainbows so I always dash around trying to get the house tidy before she gets here.   She probably wouldn’t mind that I hadn’t dusted, but it’s what Daughter-in-laws panic about, isn’t it?

Enter Motivated Mum.   The new, improved me who gets things done in plenty of time, who balances family, volunteering, housework and me-time.

1. Don’t get overwhelmed

I use my Google calendar for appointments etc., but I also have a pretty slimline paper diary for my to do list.

diary

When I get a blank sheet of A4, it fills up with everything I want and need to do.   It gets so big, I look at it and get put off from doing it.   I accumulate several scraps of paper with things to do on them which I can never find it when I need them.   Things that are important get mixed up with things that don’t really matter.   With this diary I physically can’t add too much to a page.   Also, things are dated so I know my deadlines.   World Book Day coming up?   Need a costume?   That needs to be entered in plenty of time so I can get it done rather than a last minute scrabble through the washing pile on the day.

2. Tap the app

I bought an app for my phone called Motivated Mom (yes, it’s from the US).   It suggests housework tasks to do every day so that over the course of a week, in theory my house is clean and tidy.   It doesn’t factor in Craftyguidelet chaos though.   It also suggests things like washing the garage door and other large tasks to do once a year.   I’ve programmed in things like sorting out my ‘take upstairs’ bag every couple of days.

I’ve also started a new section in Google calendars for my blog posts and twitter hashtag hours so I remember what happens when.   If I’m free, I can join in with the chats, and my blog posts are vaguely themed for each day.

3. Inspiration

I am reading ‘The Happiness Project’ by Gretchen Rubin.   There are so many things in this book that seem such simple and effective ideas.   Obviously her life doesn’t match mine, so I’m going to try a mini happiness project.   I’m starting with health and I’ll be developing that soon.

happy

4. Perspiration

One of the things that has been holding me back is my health.   I’m tired all the time, I suffered from PND and I have a dodgy back.   I’ve eliminated so many things from my diet, went on and then gave up antidepressants and I’ve tried seeing a chiropractor.   I’m now going to try and focus on exercise a bit more.   Today I walked the girls to school and then walked to the local farm shop, bought some veg and then walked home which was almost a 3 mile round trip.

field

It was a beautiful day today so it was lovely being outside (apart from the weight of the veg I had to carry and my shoes which rubbed just a bit too much).   Having a bad back has prevented me from using the gym for a while, but I need to allocate some time now so I can get more active more often.

I am going to try harder to get more enthusiastic and interested about things, and hopefully I have the tools to do this now.   WI bag is ready, Craft Club bag is ready, Guide email sent, now to sort out cleaning the toilets.   Hmmm, can anyone tell me how to get motivated to do that?

Teacup Pincushion

I have seen lots of tutorials on how to make a teacup pincushion (including this one), so a few weeks ago I found a pretty teacup at a fair with a view to making one for myself.

cup


It sat on my desk and all my sewing bits and pieces accumulated in it, but it never got made.   Until Saturday that is when the Craftyguidelets were “tidying” their playroom (translated as moving all their toys out and into the hallway so I could vacuum and being reluctant to move them back).   To stop myself from getting frustrated with the progress downstairs, I decided to get creative upstairs.

gather


First of all I drew a circle on a scrap of fabric using the saucer as a template.   I then gathered around the edge to make a dome.

stuffing


I added stuffing to this.   I’ve seen other people use scourers to keep their pins sharp, but I had stuffing in my stash.

glue


I glued the cup to the saucer using my hot melt glue gun and then put an extra bit of stuffing in the bottom of the cup.   I ran some glue round the rim of the cup and pushed the fabric dome inside.   I think I should’ve used a different glue as the hot melt dried very quickly and my fabric wasn’t evenly stuck.   I was able to push a bit more stuffing inside before gluing the last bit.

Ta dah!

finished


Linking to the Handmade Harbour Handmade Monday and Pinaddicts Challenge blog posts.   See what everyone else has been creating.

School Craft Club – Plate Weaving

I have a board on Pinterest for kids craft ideas for craft club.    One of the ideas that I put on there was paper plate weaving which originated from the aesthetic outburst blog.   I modified it a bit for our 5-9 year old crafters and came up with the following.

photo (97)


I cut 19 notches around the edge of the plate and wrapped some wool around it evenly.   I chose an odd number so the weaving would alternate the unders and overs.   I knotted it off so there was a small end in the middle to start the weaving with.   Doing this 30 times got a bit repetitive, but because our crafters are young, it was necessary to make it slightly easier for them.

The parent leaders of the club had lots of wool to play with, thanks to the donation of a huge stash by the lovely @meanyjar.   We cut lengths of various colours for the kids to choose from, and tied in one strand at a time for lots of over and under work.   This activity lasted three 30 minute sessions, and even then, most children took home some wool to carry on with.

These are a couple of works in progress.   There were some which were ‘less neat’, but the children all worked really hard on them and were really proud when they took them home.

photo (98)photo (99)-001


And this one is my 4 year old’s effort (with some help from mummy).   She is at nursery and finishes school midway through the lunch break, and the lovely teaching assistants deliver her to craft club on their way to lunch.   She doesn’t always get the chance to do a full project so we did this at home.   I gave her a large needle threaded with wool to make it easier to do the weaving.

photo (100)


Time to trawl Pinterest for more ideas for after half term!